Reclaim is better when you sign in
Become a Reclaim Member to save all your home and style inspiration.
or login here
How to create a contemporary rustic headboard
Author: Marcie K
© Marcie K
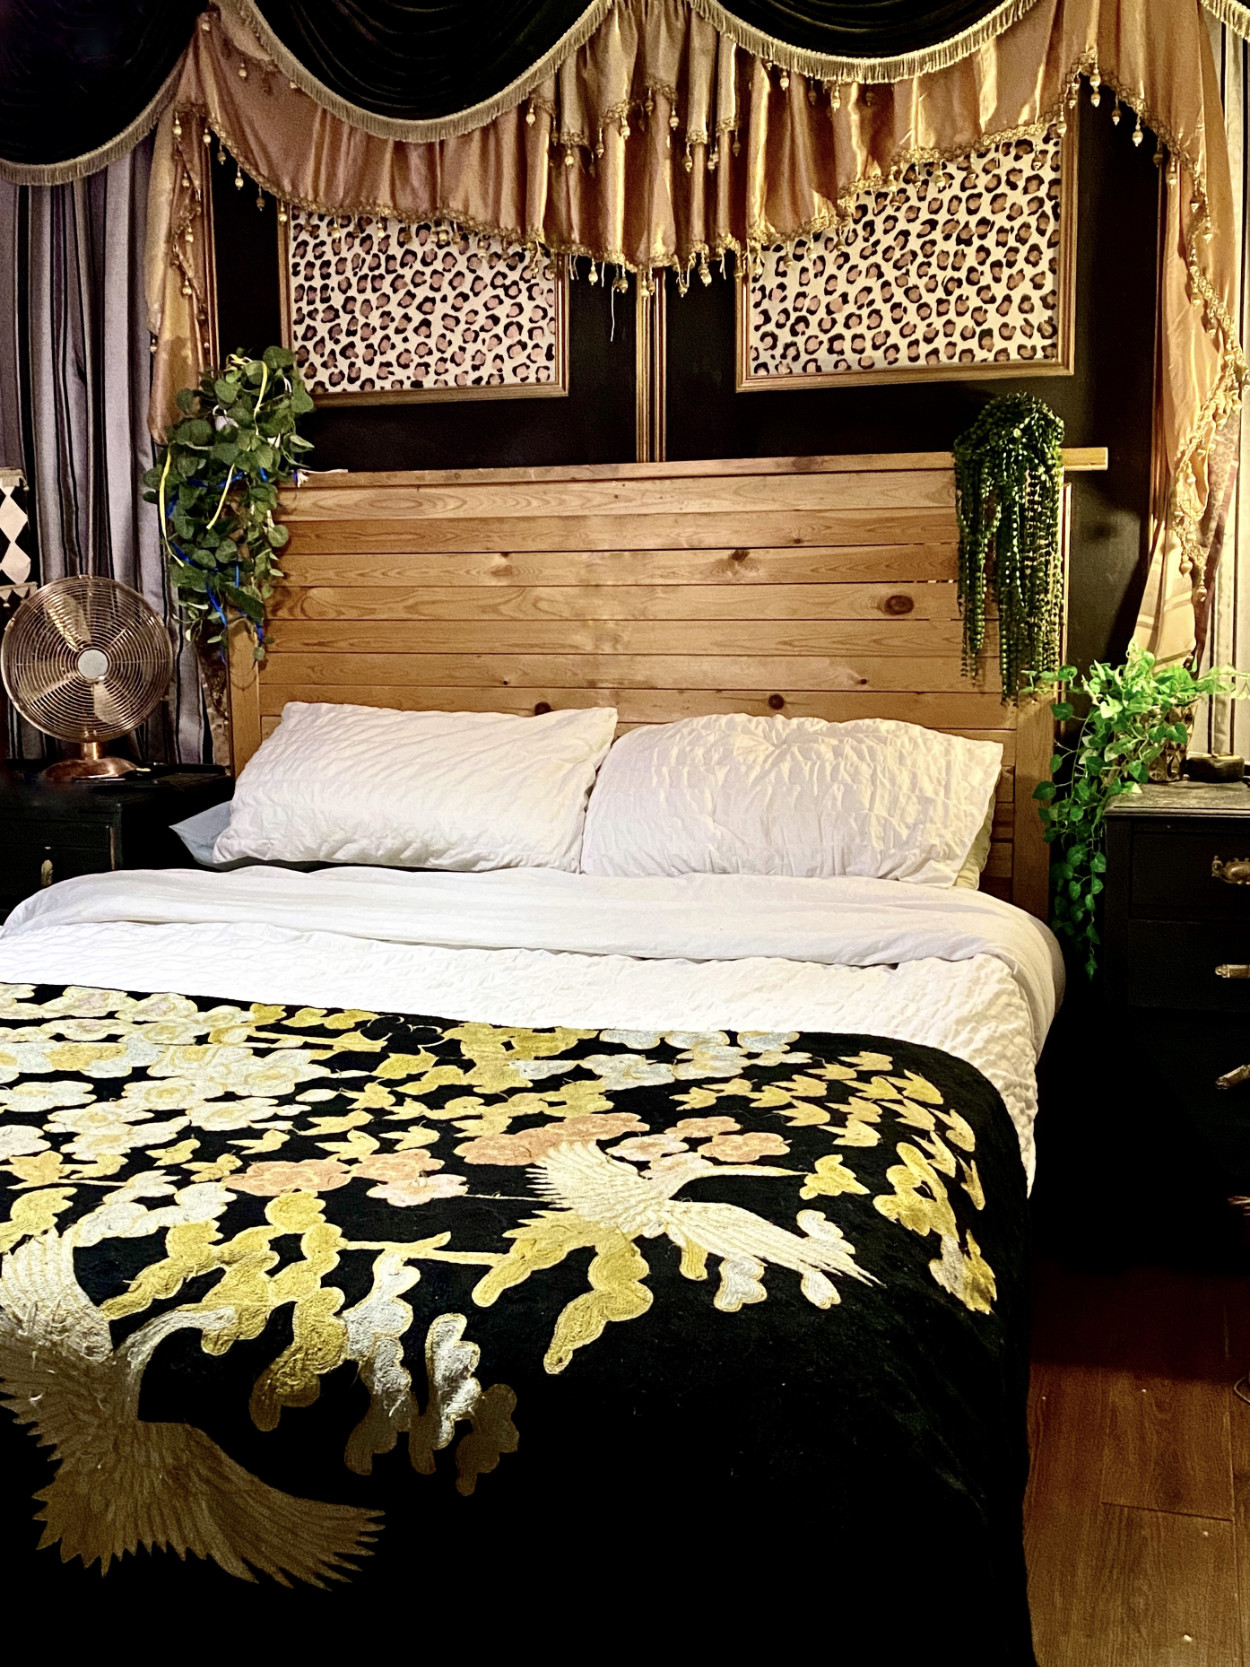
Creative upcycler Marcie K gives an unloved bed frame a thrifty makeover
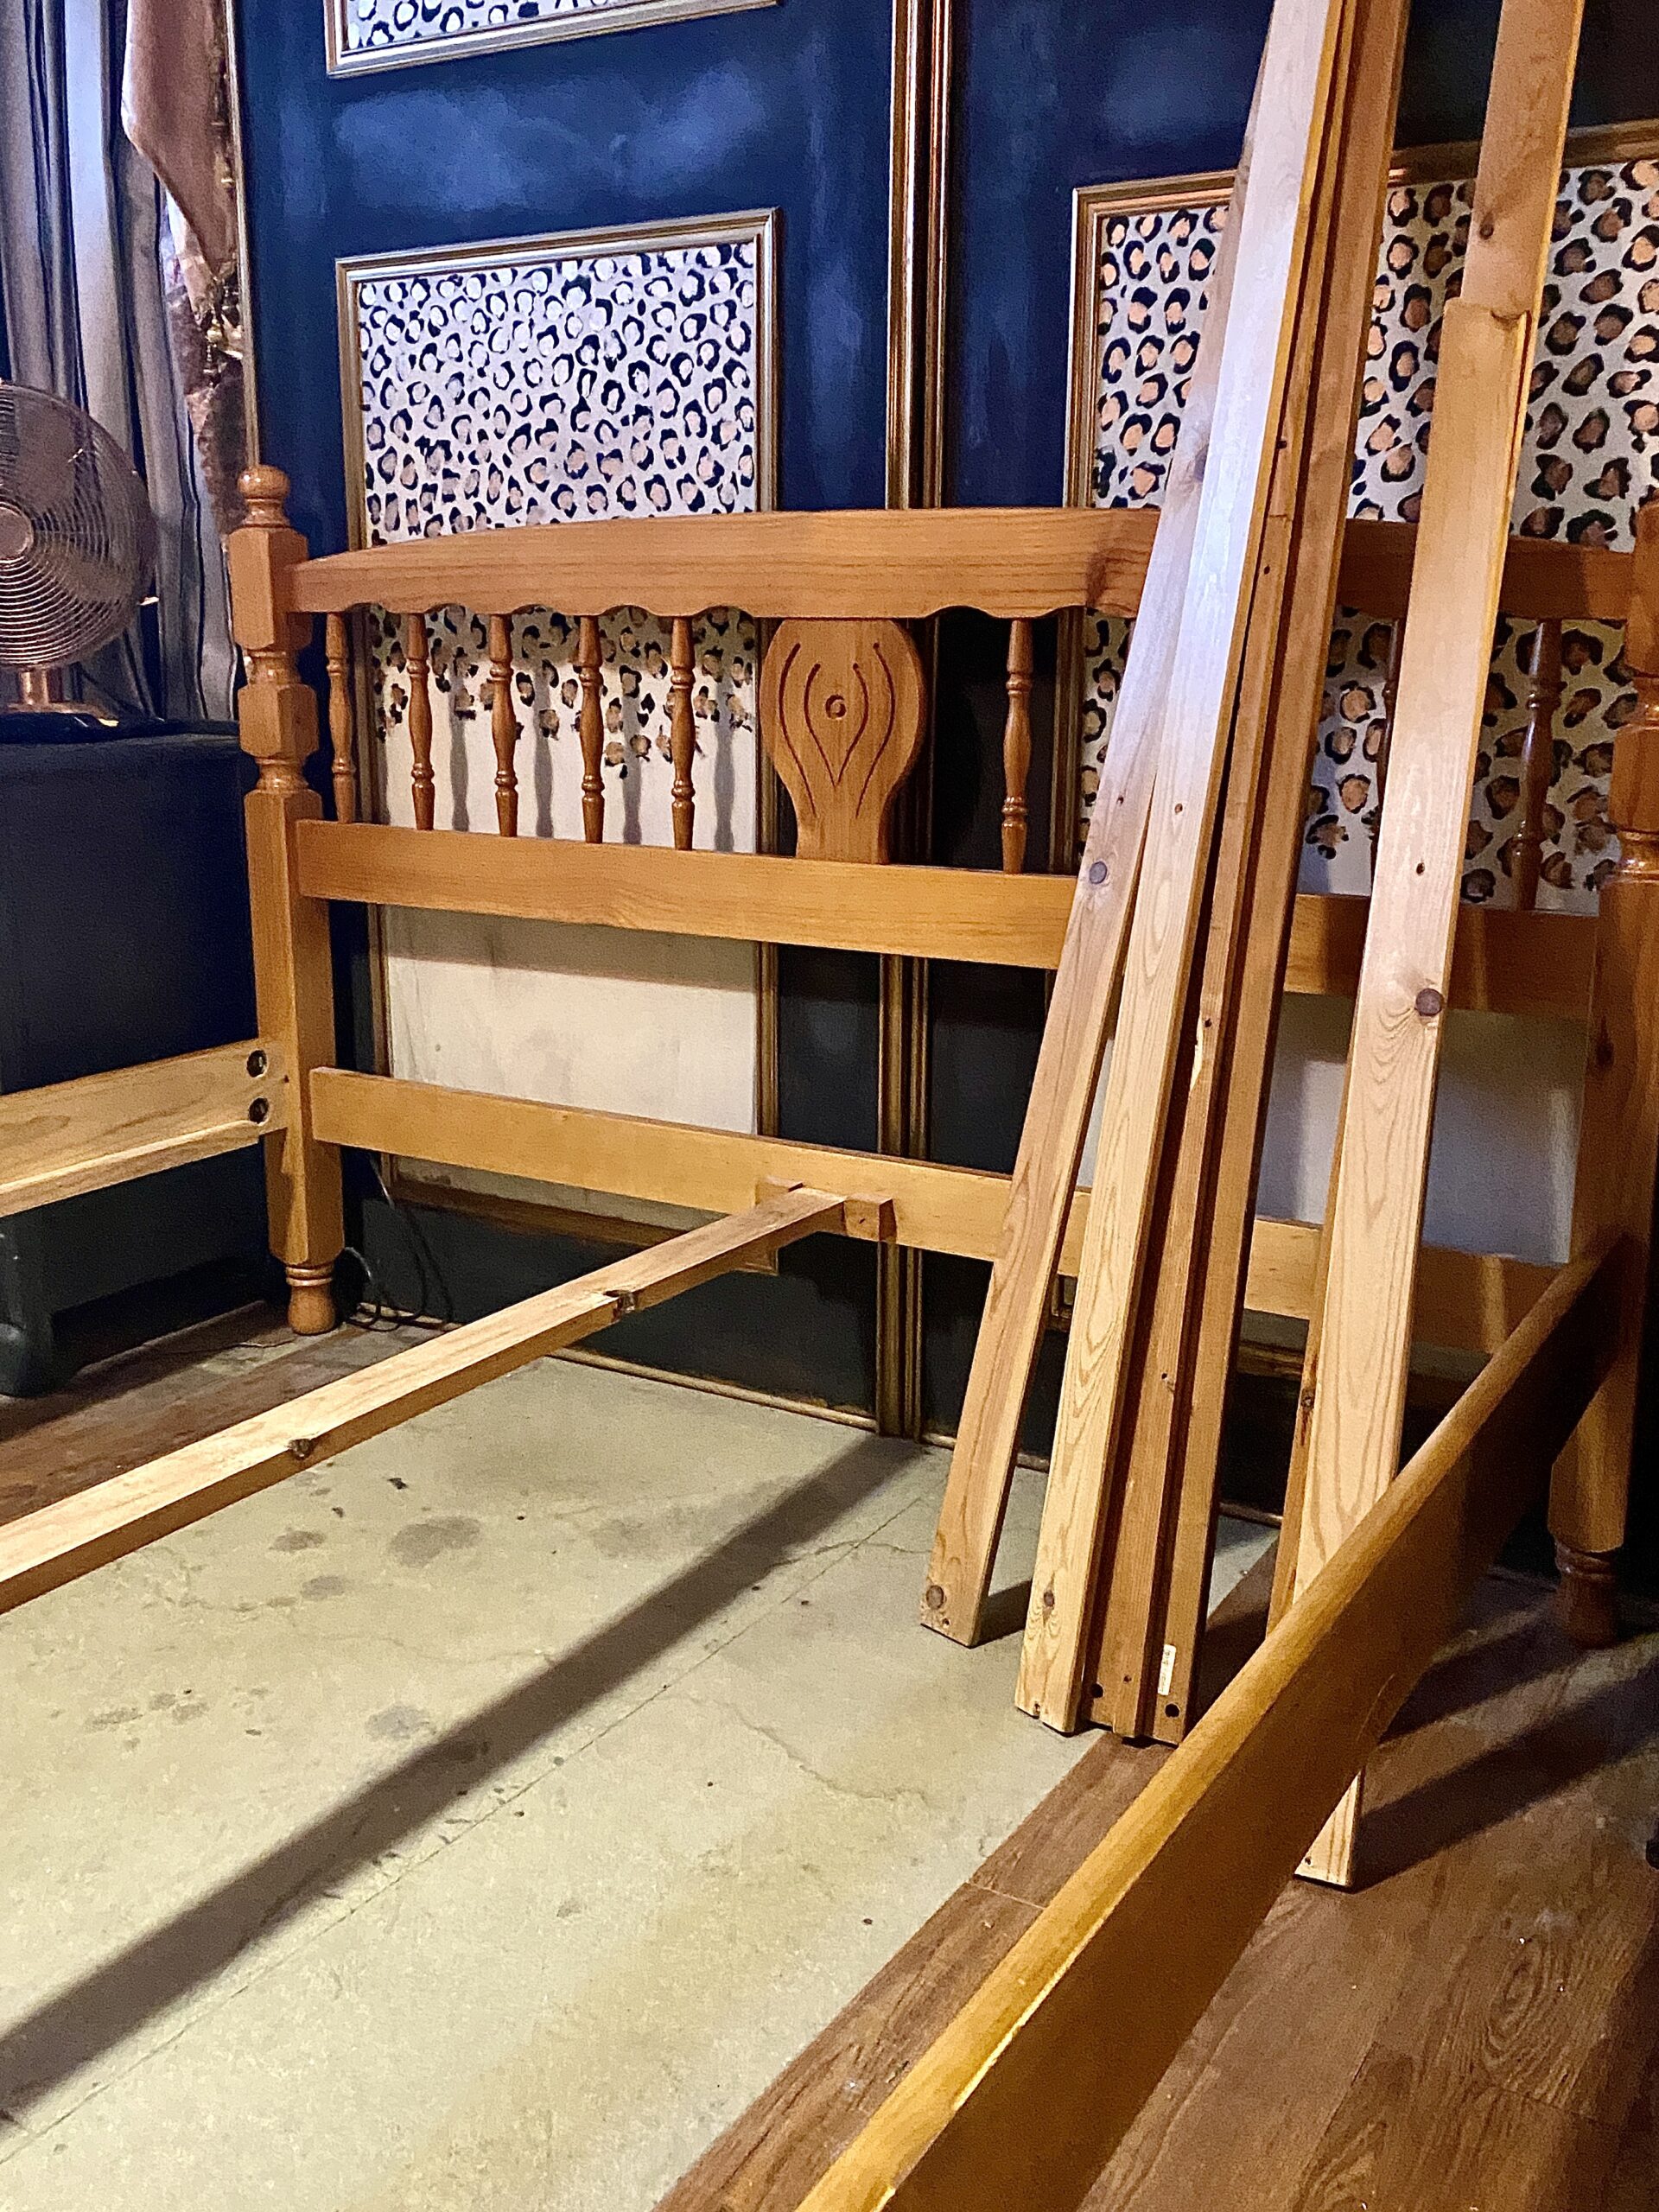
Due to the nature of my upcycling work, I often inherit furniture from family and friends, which is how I ended up with an orange-pine spindle bed. While the style isn’t my cup of tea, it’s so much sturdier than my current bed so I couldn’t say no. So in the true spirit of upcycling, I used the wood from my old bed to box in the spindles I hated so much and give it a more contemporary feel. But the added bonus of having a shelf to hang plants, or better still, fairy lights, like some sort of interior influencer, is really what got me excited.
This is just a rough tutorial – your bed or project will be different – but I hope it gives you some ideas on how to change things you have using leftover wood.
Marcie K
1 Work out the size of your headboard
Start by measuring the size you want the headboard to be and divide this by how much wood you have. You will need to cut some wood to make a framework to screw your headboard into too; I used three slats of wood for this. Once you have determined the height of your headboard, sort the wood you need to use for the headboard, the frame, plus two pieces to hide the bedposts.
Marcie K
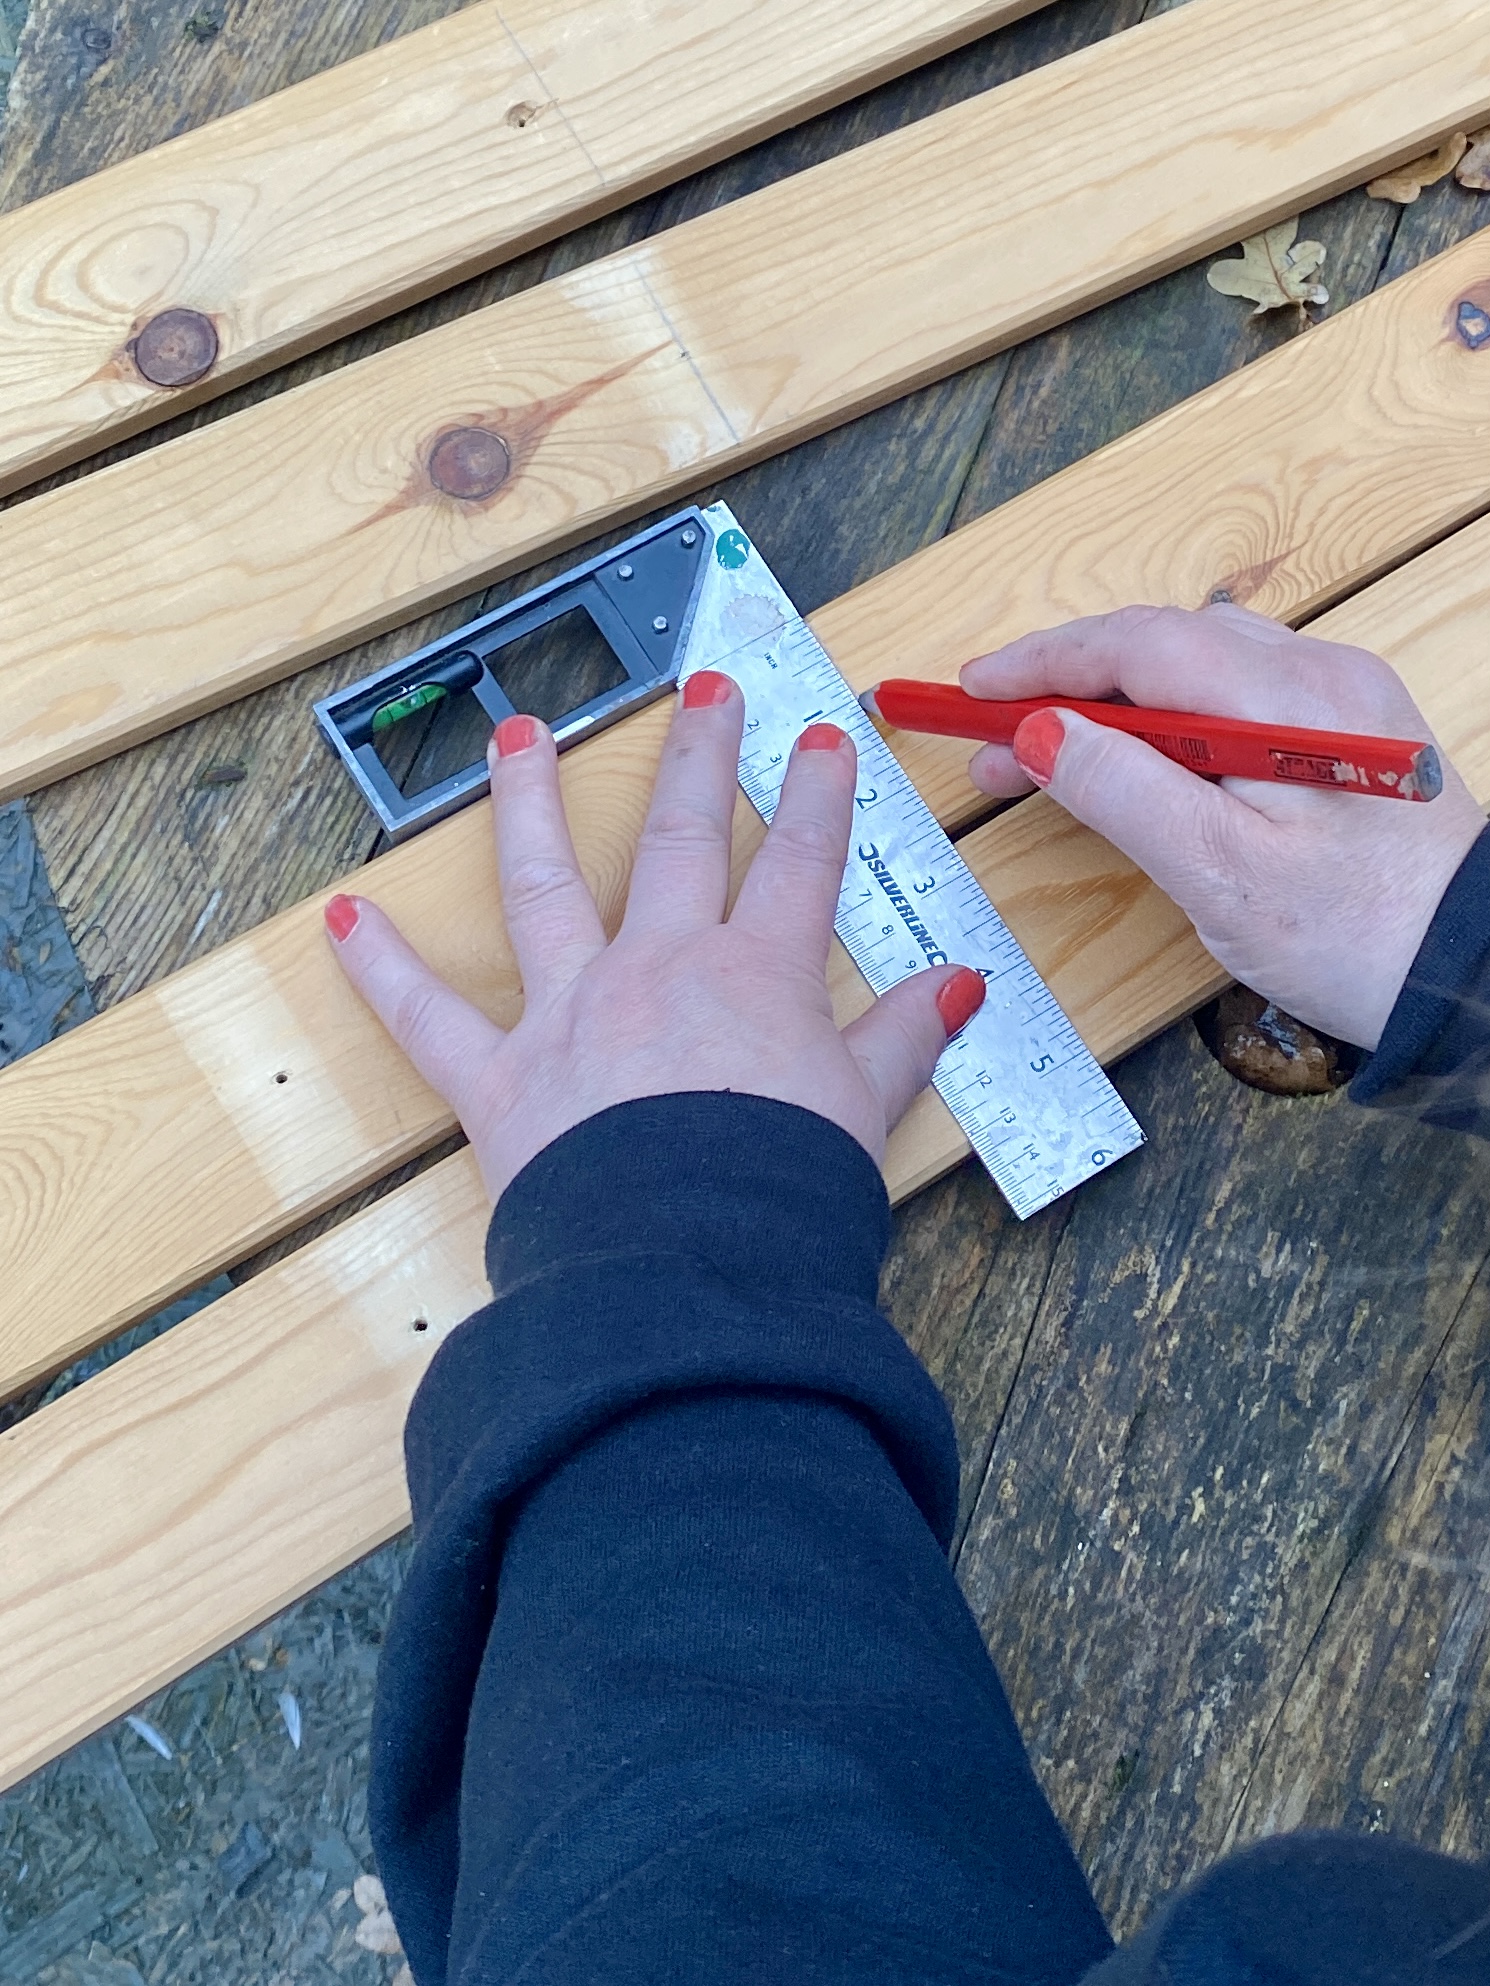
2 Measure and cut the wood
Using a square ruler, measure and mark where you need to make all your cuts. I used a cordless circular saw to cut my wood but a handsaw is fine (C). If the cut ends are very rough, just rub them down with sandpaper.
Marcie K
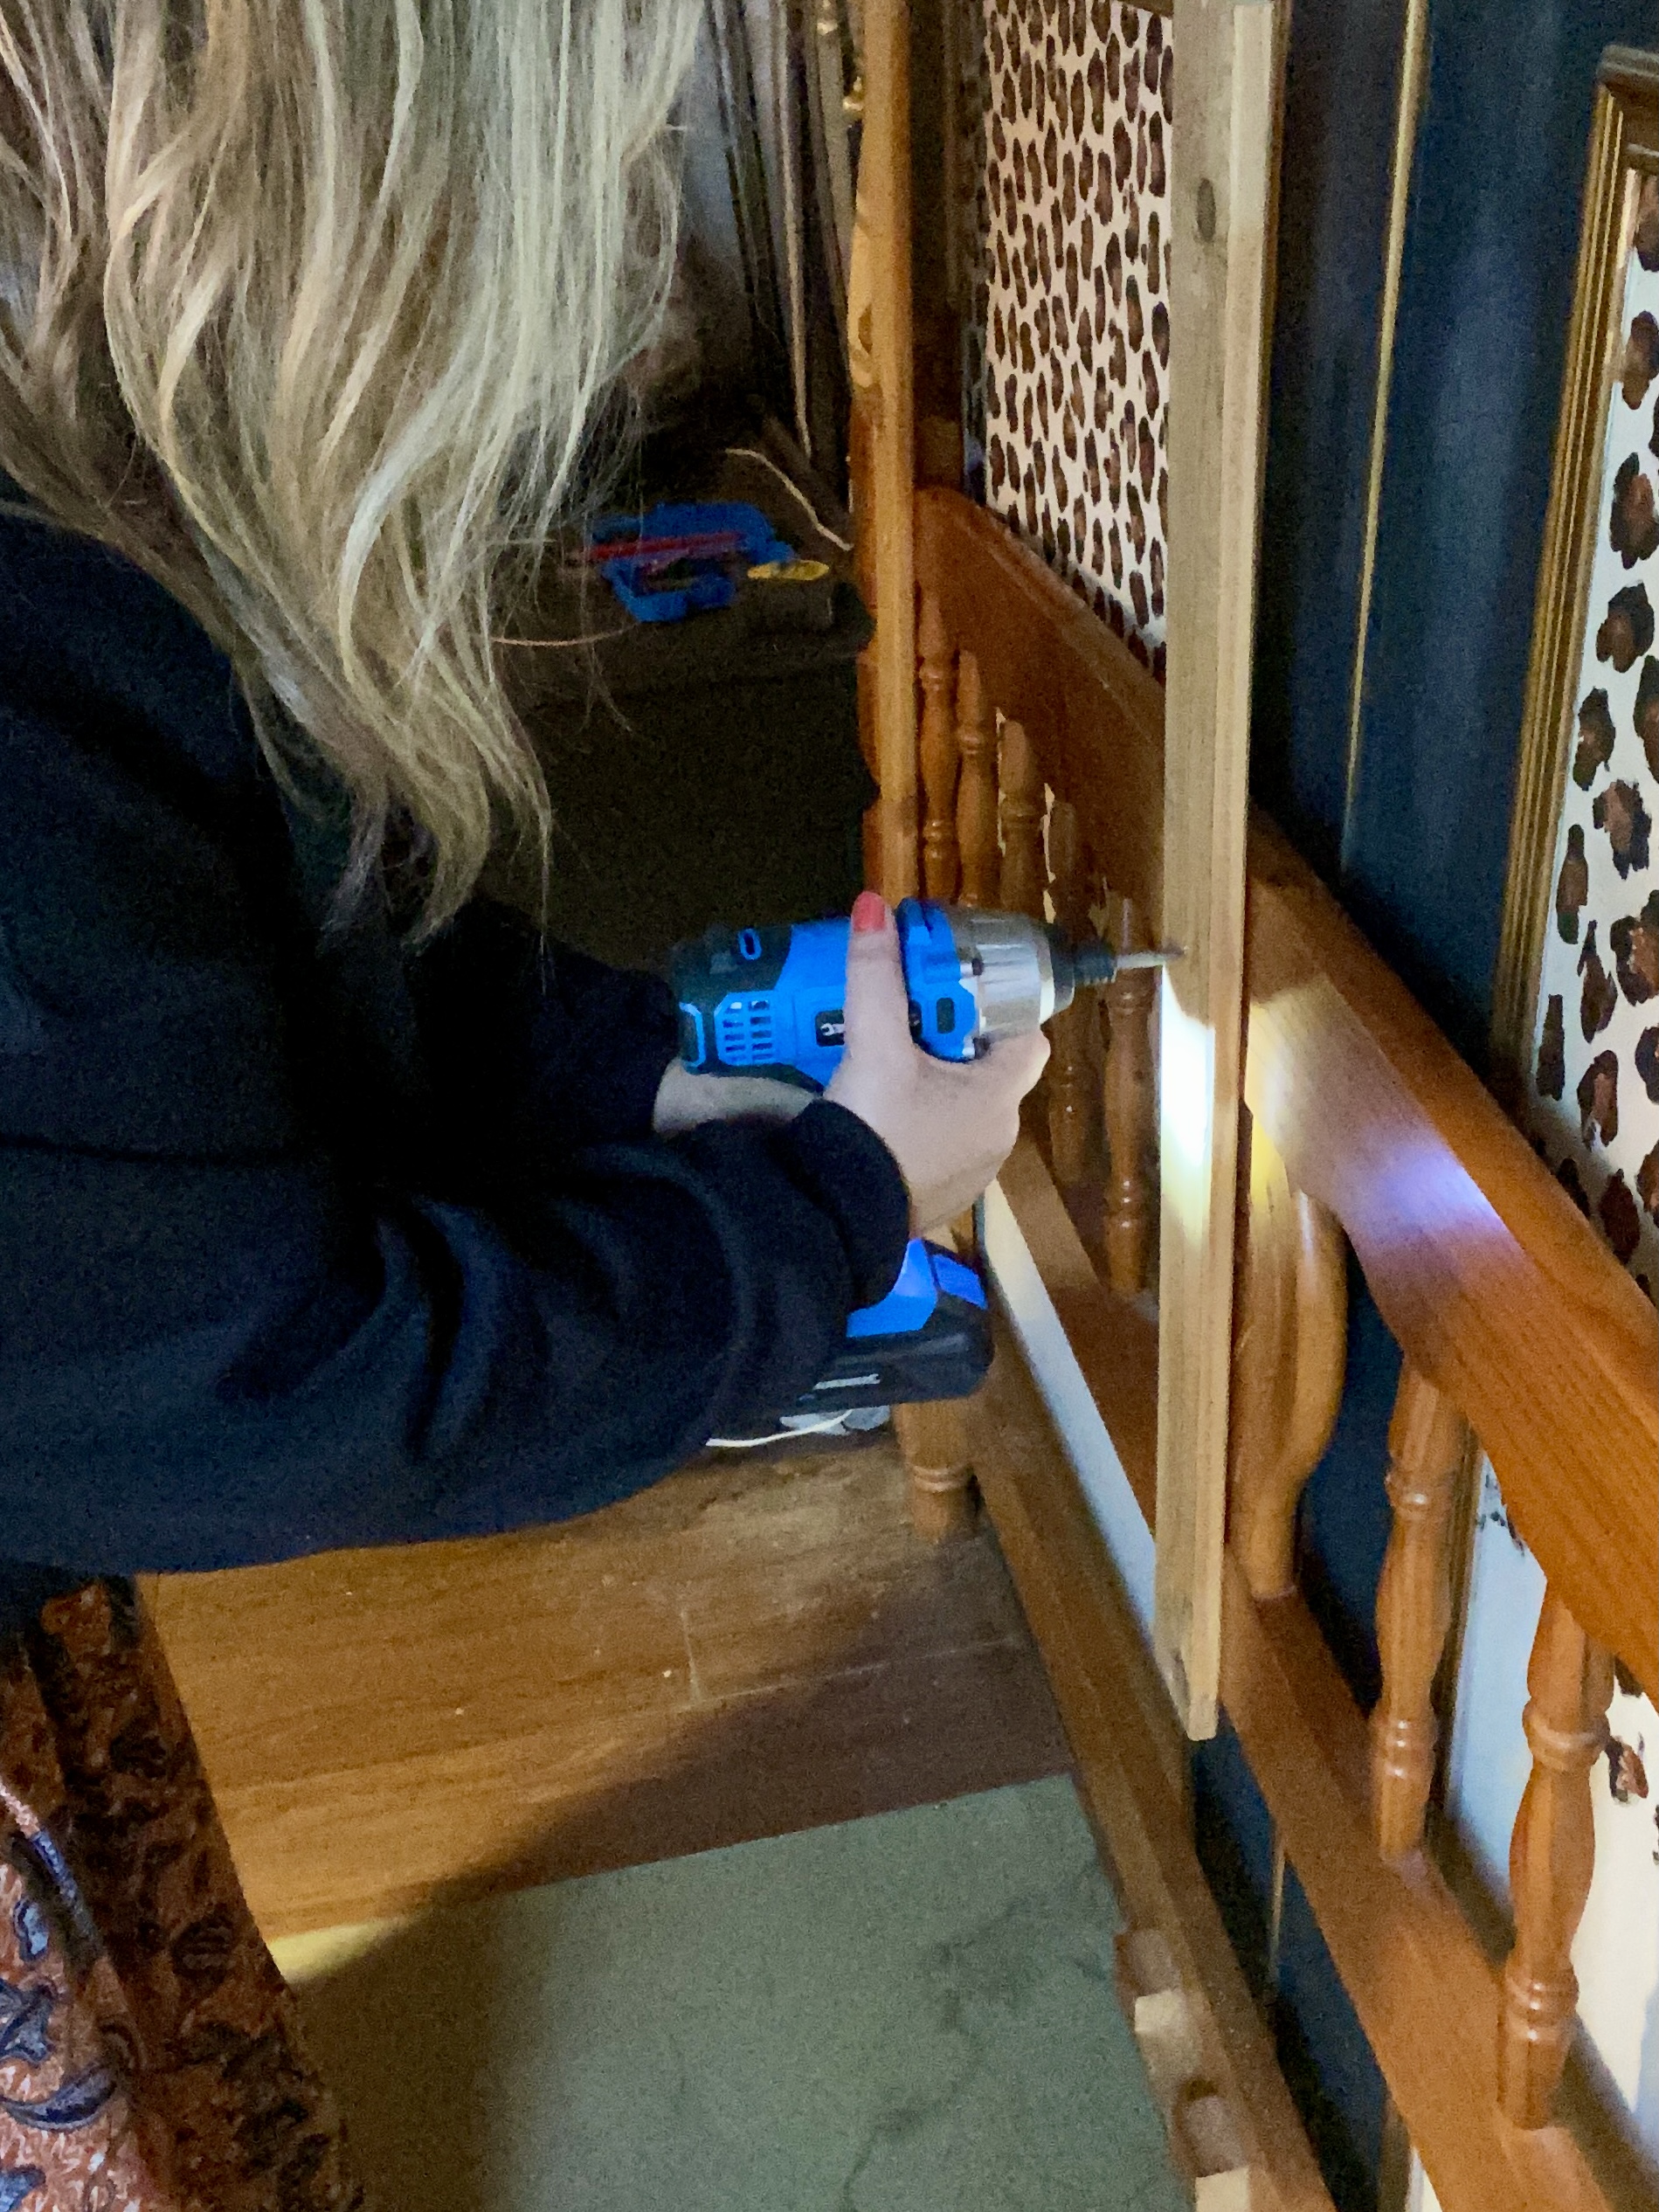
3 Make the frame for the headboard
Place the wood you are using to cover the bedposts in position, then attach two pieces of wood at the sides and one in the centre of the old bed frame. Drill pilot holes first with a small bit, which stops the wood splintering and makes it easier to put the screws in. Changing to a countersink bit, bore into the pilot holes on the slats, so that when you put the screws in they lay flush with the wood.
Marcie K
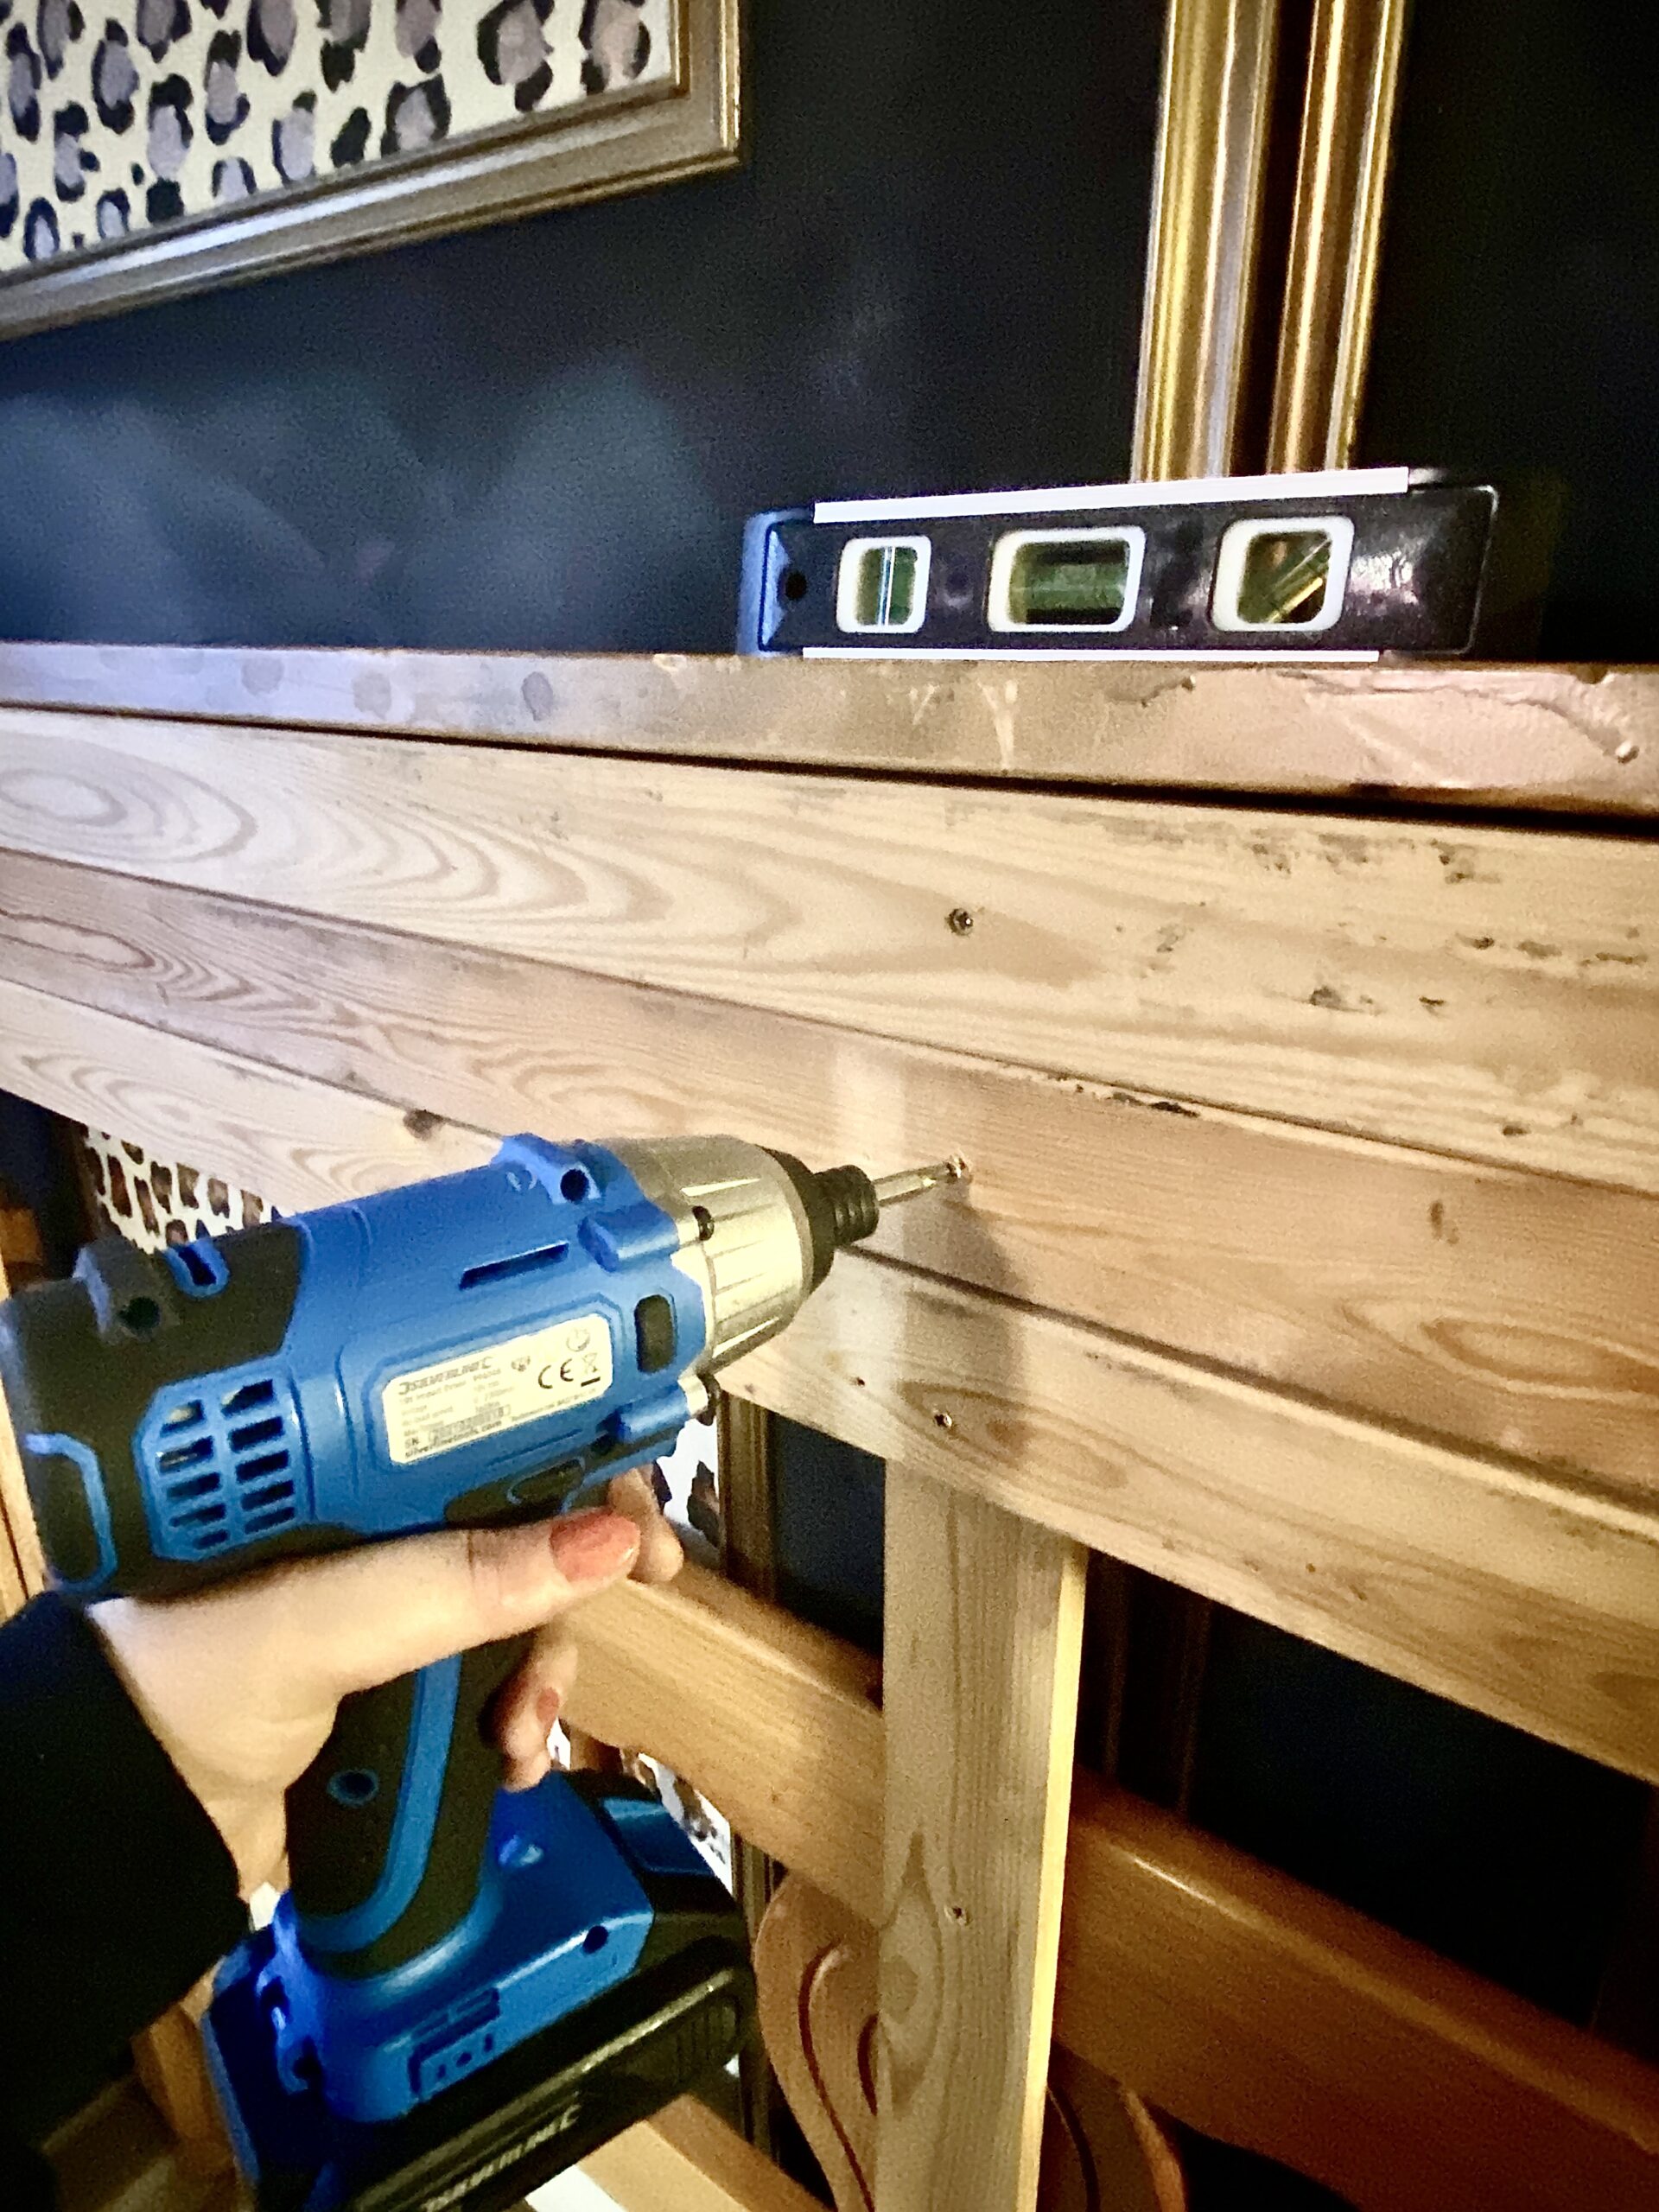
4 Start screwing the headboard in position
As a guide, place a spare piece of wood on the top of the frame, together with a spirit level, to ensure everything is level. Then, butting each slat up against each other, pilot-drill then sink the screws. Attach each piece of wood on to the centre of the frame first, so if they do start to tilt you can make sure they are level them before screwing in each end.
Marcie K
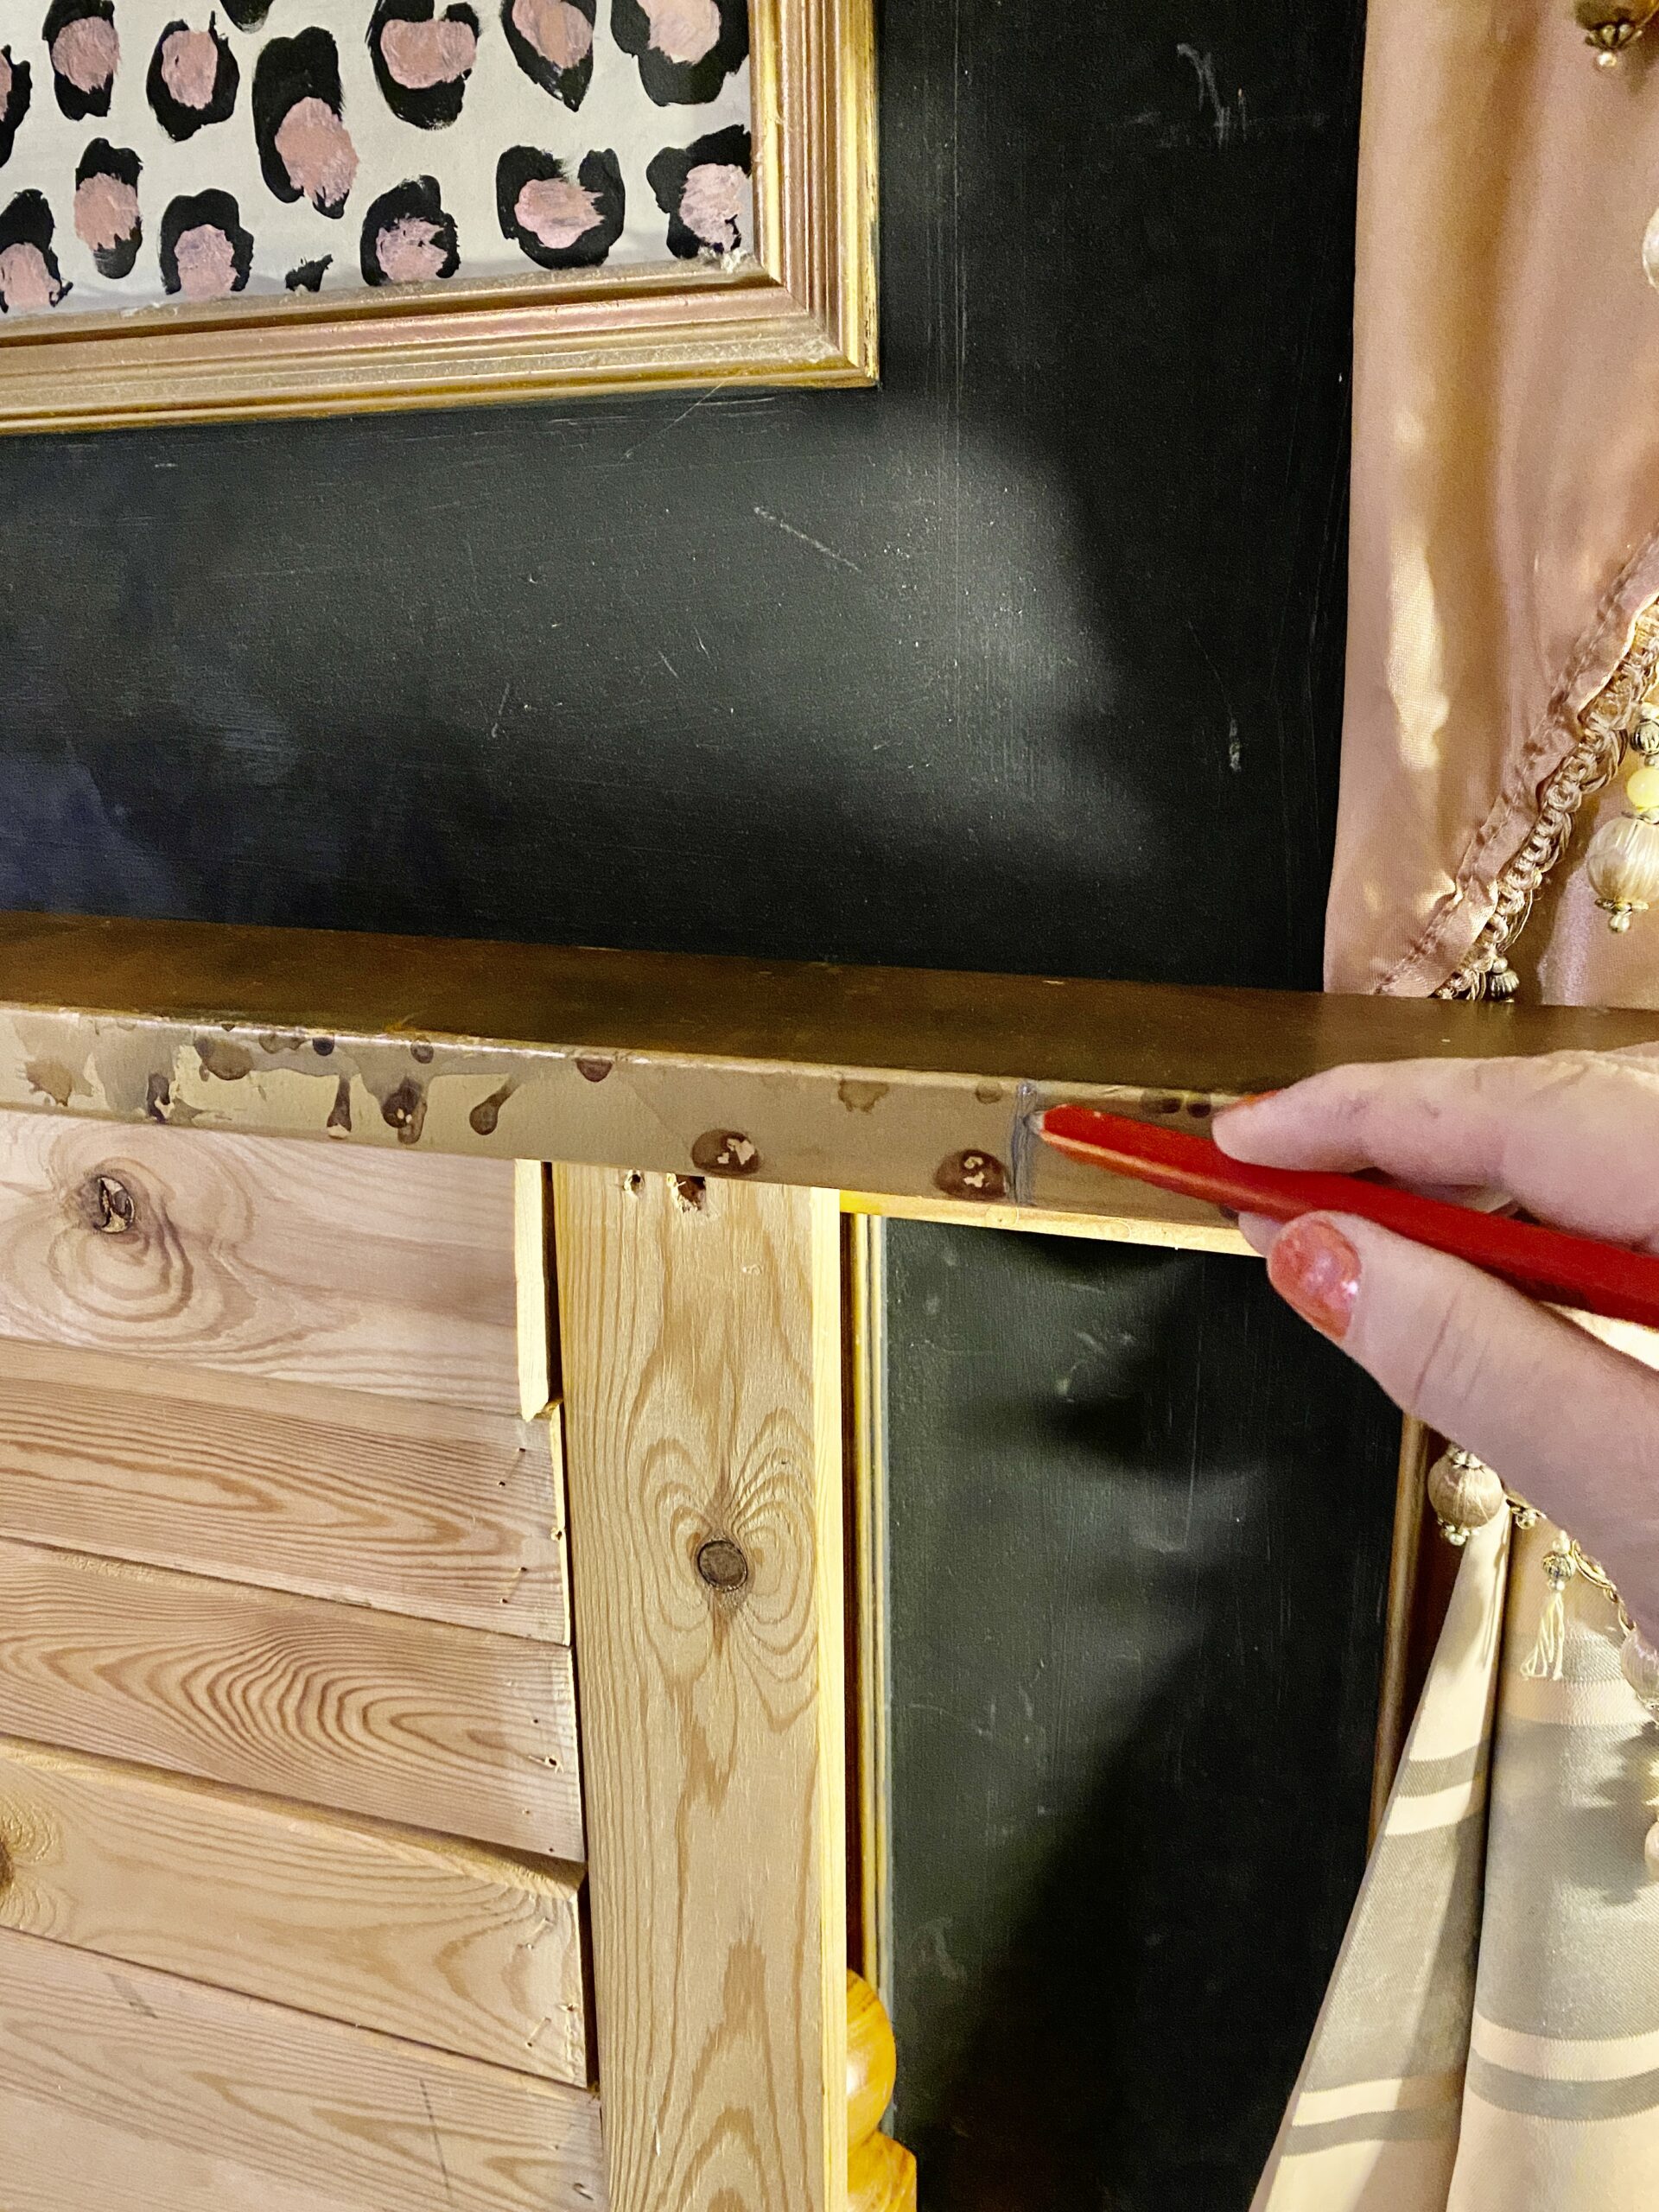
5 Make the shelf
Once the headboard is finished, measure how long you want the shelf to be. Cut and place it on top of the headboard, screwing through it in a number of places to hold it in position. Sand out any imperfections, if required.
Marcie K
Top tips
- The headboard could be boxed in with flat wood or MDF – IKEA always has loads of this up for grabs in their recycling bins
- Rout out holes for small lights to create an even more contemporary feel, or add LED lights under the shelf
- Waxes are amazing for a quick colour change
Before you go...
...fancy automatic entry to all future competitions?
Simply register online today for FREE and you will get:
Automatic entry to all current and future competitions.
Access to Reclaim Inspiration - an online visual pinboard for saving all your home and style inspiration.
A regular newsletter of inspiration, ideas and advice.

Save all your articles in one place
Become a Reclaim Member to save all your home and style inspiration. Simply login or register online today for FREE and you will get:
Automatic entry to all current and future competitions.
Access to Reclaim Inspiration - an online visual pinboard for saving all your home and style inspiration.
A regular newsletter of inspiration, ideas and advice.